Setting up a Linux Virtual Machine on Microsoft Azure
Today, I’m putting on my nerd’s hat to show you how to setup a Linux Virtual Machine on Microsoft Azure. This a just a basic setup. From there, then, you can decide what you would want to do with your Virtual Machine.
Okay, lets get our hands dirty.
- Login to your Microsoft Azure Portal by going to https://portal.azure.com

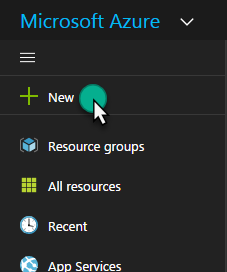
2. Click on the “New” button on the left-side
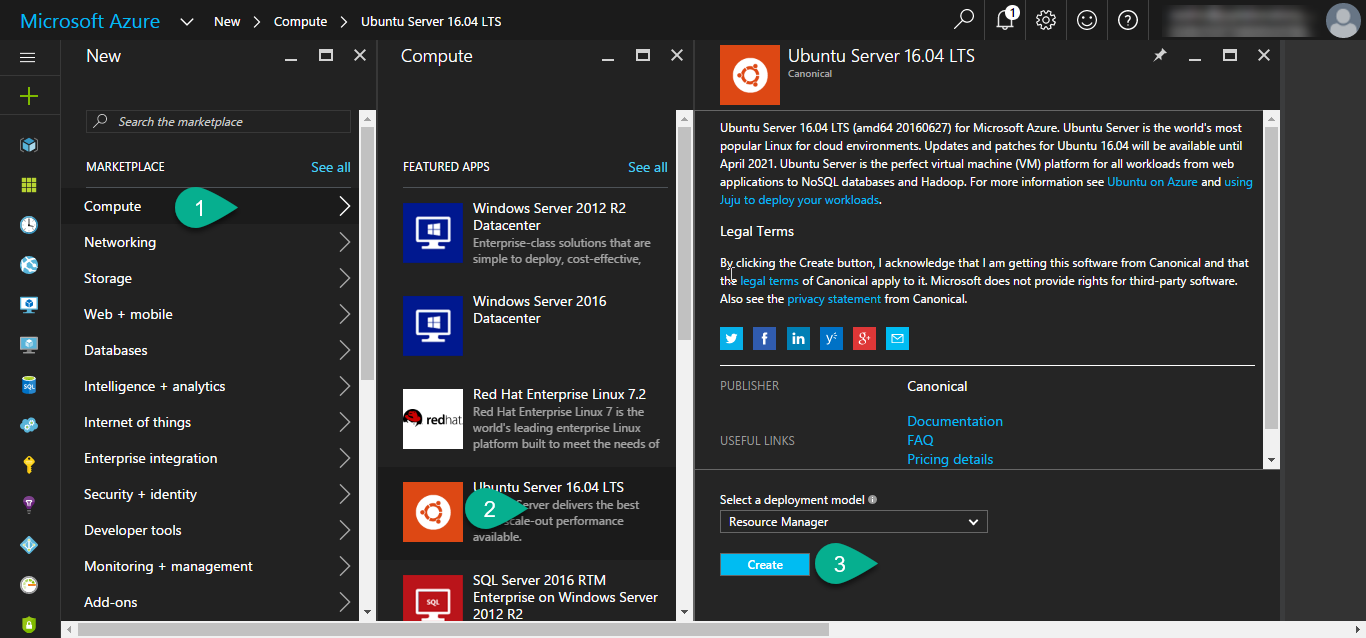
3. Click on Compute, choose Ubuntu Server and make sure Resource Manager is selected as the Deployment Model then press Create.
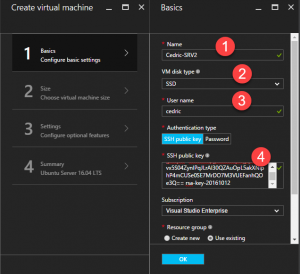
Configure Virtual Machine (First Steps).
- Give your VM a name
- Chose your storage type (Either SSD or HDD)
- Enter a username
- Insert your SSH public key or set a password
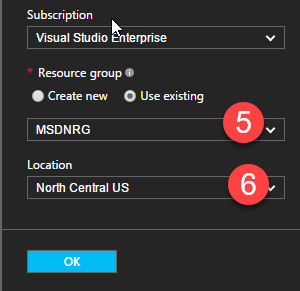
- Choose an Existing Resource Group or create a new one
- Lastly, select where you want to deploy your server. Choose the region nearest to yours.
Press OK to move to the next step.
Size and Pricing (Second Steps)
This is tricky part. The size you will want to choose will depend on what you want to do with the VM. For instance, if you want to use it as a Web Server then the Standard Package DS1V2 will suffice for an average website. So go ahead, explore and choose the package that suits your needs best.

If you just want to fool around, then go back to the previous step, change your storage type to HDD then again on the Size and pricing section click on “View All” and select the A1 Basic package.
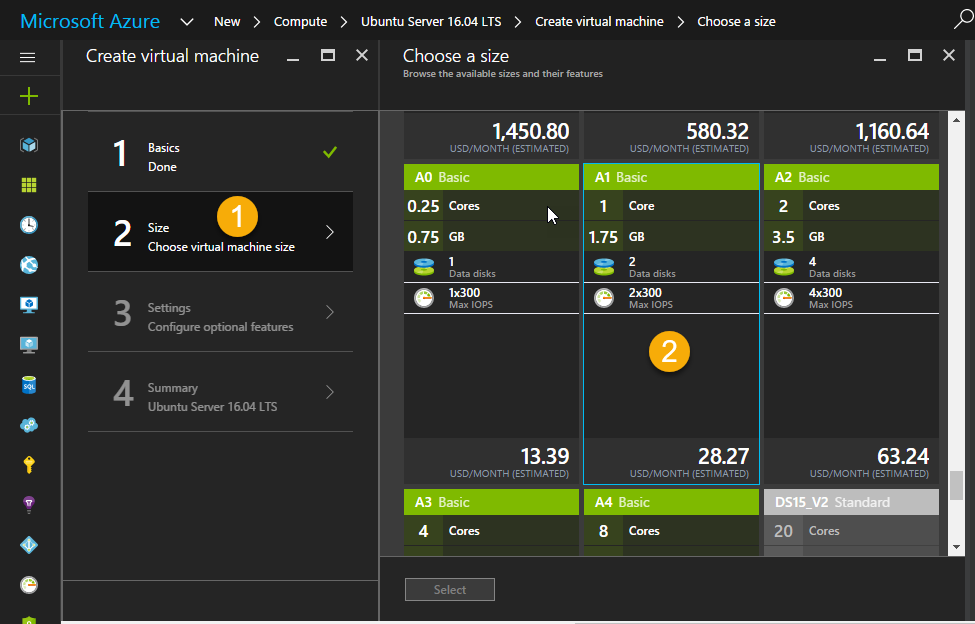
For the sake of this tutorial, I will use the standard one.
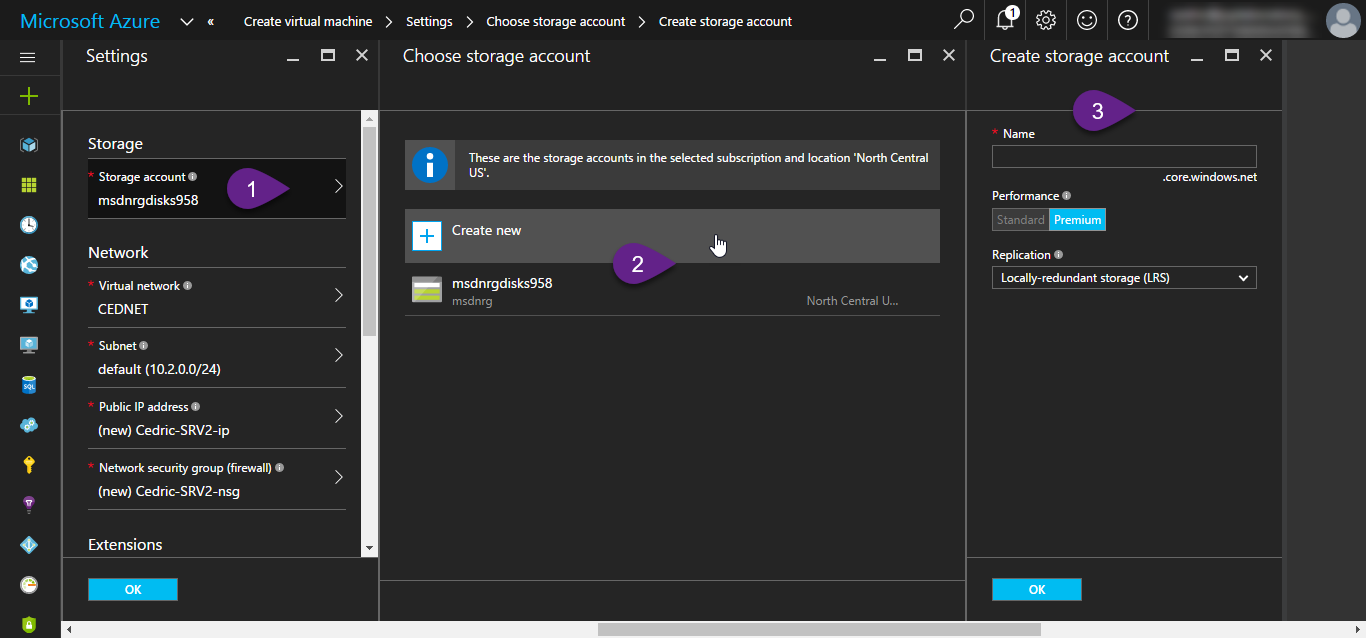
Other Settings (Third Steps)
We need to create a storage account.
- Click on storage account
- Select an existing account or create a new one
- Name the new account then press OK.
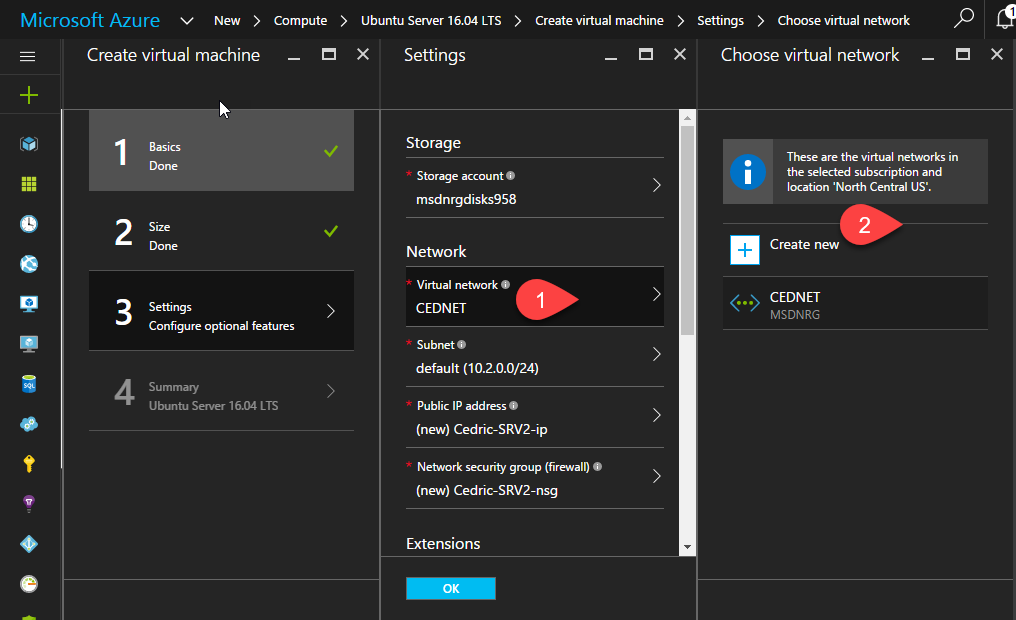
Then you are required to create a virtual network to put your VM in. Note that, thereafter, all VMs that you will put in this Virtual Network should be created in the same region you have selected in the first steps.
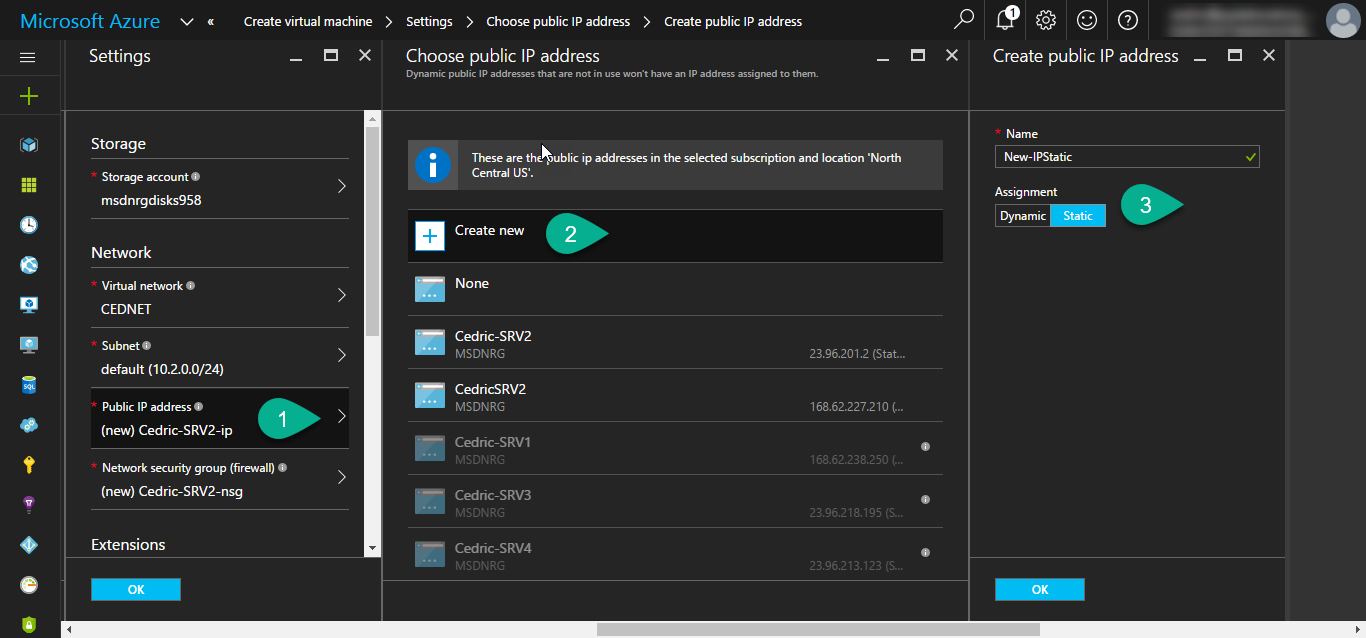
Next step is to assign your Virtual Machine an IP address. Now again, depending on what you want to use the VM for, you have the option to decide whether to use a Static or a Dynamic IP address. If you want to have it configured as a Web Server later, I recommend using a Static IP. Here’s how:
- Click on Public IP Address
- Select Create New
- Then set a name and select Static
Select OK to continue.
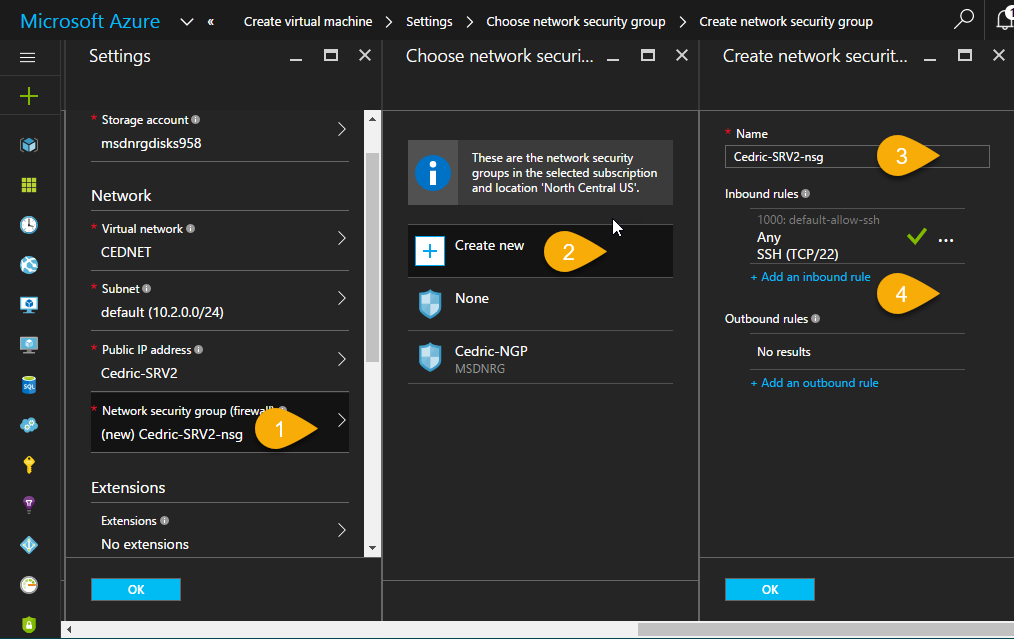
Our Virtual Machine now has a public IP Address which means it can be accessed from the Internet. Hence, we need to protect it. This is where the Network Security Group comes in action.
It defines a specific set of open ports that you’ll be using for inbound and outbound connection to your VM while restricting access to other ports that you’ll not be using. For instance, you will see that port 22 is opened by default. Port 22 is used by Secure Shell for remote connection.
You might want to set a new inbound rule for ports 80 and 443 to enable HTTP and HTTPS traffic in case you want to setup a web server.
To create a new Network Security Group do the following:
- Click on Network Security Group
- Select Create New
- Name your NSG
- Create rules for any other port you want to open
Click on OK to continue.
We are not going to configure Extensions and High Availability set just leave it still.
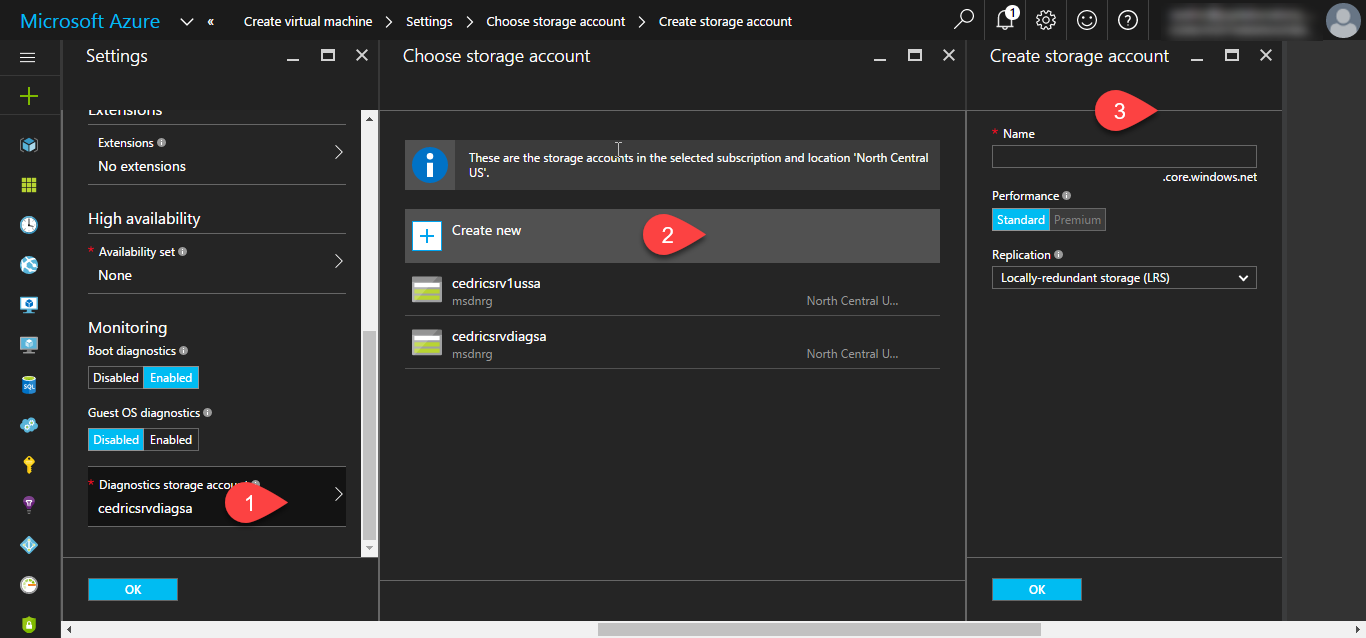
Lastly, we need to setup a diagnostic account where all metrics information like CPU and network usage will be stored.
- Select storage account
- Click on create new
- Name your storage account
Click OK to continue.
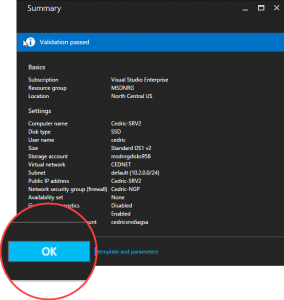
Deployment
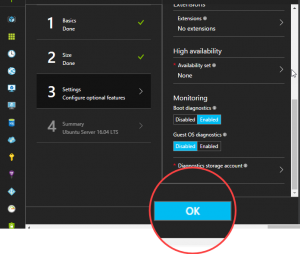
Great! We have finished setting up our first Linux VM. Press OK on the settings pane and validate to start deployment. This will take some time so go grab a coffee.
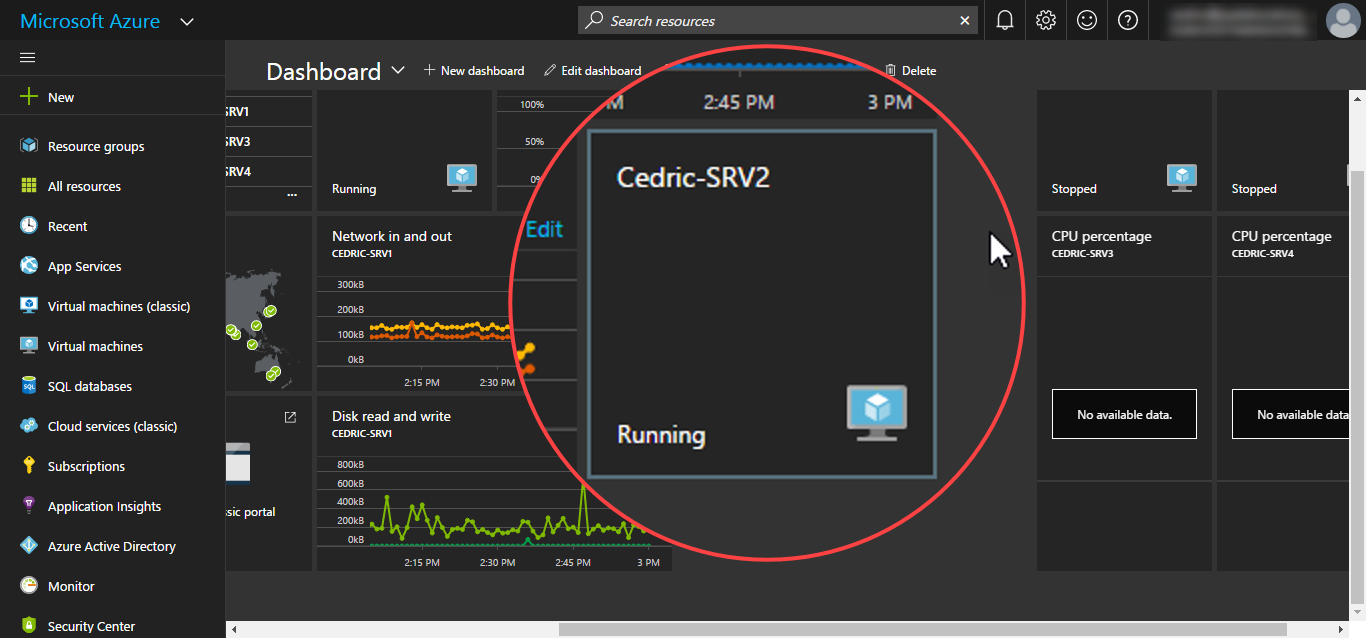
After a successful deployment, the VM should appear on your Dashboard. Click on it.
The Virtual Machine’s public IP Address will appear on under the Essentials properties.
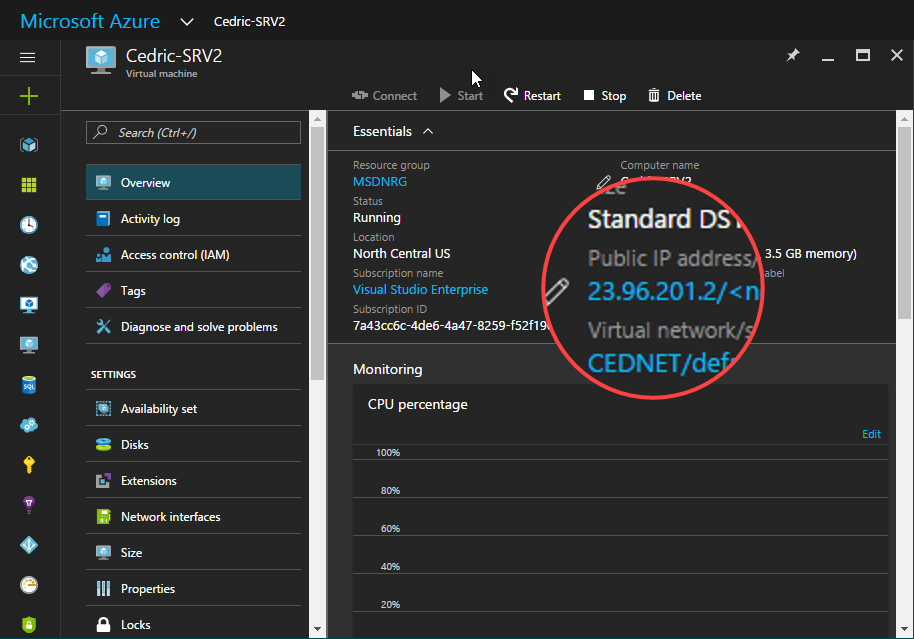
Now, you can easily use puTTY to connect to your VM and get it ready for some good use 😉
Regards,
Cédric

![[Event] Introduction to Linux & Free Open-Source Software](/content/images/size/w720/wordpress/intro-linux2-1.jpg)